Magento là một mã nguồn mở và là một trong những nền tảng thương mại điện tử phổ biến nhất giúp các lập trình viên tạo ra các trang web thương mại điện tử. Nó được viết bằng PHP, cho phép bạn tạo một hệ thống giỏ hàng linh hoạt. Nó hoàn toàn có thể tùy chỉnh và sẽ cho phép bạn phát triển và ra mắt một cửa hàng trực tuyến đầy đủ chức năng trong vài phút. Magento cung cấp một cộng đồng miễn phí và một phiên bản thương mại, phiên bản cộng đồng miễn phí và được thiết kế cho các doanh nghiệp nhỏ, trong khi phiên bản thương mại được thiết kế cho các công ty vừa và lớn.
Hướng dẫn này sẽ chỉ cho bạn cách cài đặt Magento trên Ubuntu 22.04.
Magento chỉ hỗ trợ các phiên bản PHP từ 7.3 đến 7.4. Tuy nhiên, phiên bản PHP 7.4 không được bao gồm trong kho lưu trữ mặc định của Ubuntu 22.04 vì nó cung cấp PHP 8.1 làm phiên bản mặc định. Vì vậy, bạn sẽ cần cài đặt PHP 7.4 từ kho lưu trữ PHP Ondrej.
Trước tiên, hãy cài đặt các phụ thuộc cần thiết bằng lệnh sau:
Tiếp theo, hãy thêm kho lưu trữ PHP Ondrej bằng lệnh sau lệnh:
Sau khi kho lưu trữ được thêm vào, hãy cập nhật kho lưu trữ và cài đặt PHP với các phụ thuộc bắt buộc khác bằng lệnh sau:
Tiếp theo, chỉnh sửa tệp cấu hình PHP và thay đổi mặc định cài đặt:
Thay đổi các giá trị sau:
Lưu và đóng tệp sau đó khởi động lại dịch vụ Apache để áp dụng cấu hình thay đổi:
Sau khi hoàn tất, bạn có thể tiến hành bước tiếp theo.
Trước tiên, hãy đăng nhập vào shell MySQL bằng lệnh sau lệnh:
Sau khi kết nối với MySQL, hãy tạo người dùng và cơ sở dữ liệu cho Magento bằng lệnh sau:
Tiếp theo, cấp tất cả các quyền cho Magento2 cơ sở dữ liệu:
Tiếp theo, xóa các đặc quyền và thoát khỏi MySQL bằng lệnh sau:
Đầu tiên, hãy cài đặt công cụ dòng lệnh Curl sử dụng lệnh sau:
Tiếp theo, cài đặt Composer bằng lệnh sau:
Sau khi cài đặt Composer, bạn sẽ nhận được thông báo sau đầu ra:
Bạn có thể kiểm tra phiên bản Composer bằng lệnh sau:
Bạn sẽ nhận được thông tin sau output:
Bạn sẽ được yêu cầu cung cấp khóa truy cập như hiển thị bên dưới để tải xuống Magento:
Sau khi Magento được tải xuống, hãy thiết lập quyền sở hữu và quyền phù hợp cho Magento thư mục:
Tiếp theo, chạy lệnh sau để cài đặt Magento trên máy chủ của bạn:
Bạn sẽ nhận được thông báo sau lỗi:
Bạn có thể giải quyết lỗi này bằng lệnh sau:
Bạn sẽ thấy thông báo sau đầu ra:
Bạn cũng sẽ cần chạy lệnh sau để tắt xác thực hai yếu tố:
Bạn sẽ nhận được thông báo sau đầu ra:
Bây giờ, hãy chạy lại lệnh cài đặt Magento để bắt đầu cài đặt:
Sau khi cài đặt hoàn tất, bạn sẽ nhận được thông báo sau đầu ra:
Bây giờ, xóa toàn bộ bộ nhớ đệm và tạo một công việc cron Magento bằng các lệnh sau:
Sau khi hoàn tất, bạn có thể tiến hành bước tiếp theo.
Thêm các dòng sau:
Lưu và đóng tệp, sau đó kích hoạt máy chủ ảo Magento và mô-đun viết lại Apache bằng lệnh sau lệnh:
Tiếp theo, khởi động lại dịch vụ Apache để áp dụng các thay đổi:
Bạn cũng có thể kiểm tra trạng thái Apache bằng lệnh sau lệnh:
Bạn sẽ thấy kết quả sau:
Cung cấp tên người dùng, mật khẩu quản trị viên và nhấp vào nút Đăng nhập. Bạn sẽ thấy bảng điều khiển Magento trên màn hình sau:
Sau khi Certbot được cài đặt, hãy chạy lệnh sau để bảo mật trang web của bạn bằng Let's Encrypt SSL:
Bạn sẽ được yêu cầu cung cấp email và chấp nhận điều khoản dịch vụ như hiển thị bên dưới:
Tiếp theo, chọn có chuyển hướng lưu lượng HTTP sang HTTPS hay không như hiển thị bên dưới:
Nhập 2 và nhấn Enter để cài đặt Let's Encrypt SSL cho trang web của bạn:
Bây giờ, bạn có thể truy cập trang web của mình một cách an toàn bằng URL https://magento.example.com.
Hướng dẫn này sẽ chỉ cho bạn cách cài đặt Magento trên Ubuntu 22.04.
Điều kiện tiên quyết
- Một máy chủ chạy Ubuntu 22.04.
- Một tên miền hợp lệ được trỏ bằng IP máy chủ của bạn.
- Một mật khẩu gốc được cấu hình trên máy chủ.
Cài đặt Apache, MySQL và PHP
Trước tiên, hãy cài đặt máy chủ web Apache và máy chủ cơ sở dữ liệu MySQL bằng cách sử dụng lệnh sau lệnh:
Mã:
apt install apache2 mysql-server -yTrước tiên, hãy cài đặt các phụ thuộc cần thiết bằng lệnh sau:
Mã:
apt install software-properties-common -y
Mã:
add-apt-repository ppa:ondrej/php
Mã:
apt update -y
apt install php7.4 libapache2-mod-php7.4 php7.4-common php7.4-gmp php7.4-curl php7.4-soap php7.4-bcmath php7.4-intl php7.4-mbstring php7.4-xmlrpc php7.4-mysql php7.4-gd php7.4-xml php7.4-cli php7.4-zip -y
Mã:
nano /etc/php/7.4/apache2/php.ini
Mã:
file_uploads = On
allow_url_fopen = On
short_open_tag = On
memory_limit = 512M
upload_max_filesize = 128M
max_execution_time = 3600
Mã:
systemctl restart apache2Tạo cơ sở dữ liệu cho Magento
Magento sử dụng MySQL làm cơ sở dữ liệu phụ trợ nên bạn sẽ cần tạo cơ sở dữ liệu và người dùng cho Magento.Trước tiên, hãy đăng nhập vào shell MySQL bằng lệnh sau lệnh:
Mã:
mysql
Mã:
mysql> CREATE DATABASE magento2;
mysql> CREATE USER 'magento2'@'localhost' IDENTIFIED BY 'password';
Mã:
mysql> GRANT ALL PRIVILEGES ON magento2.* TO 'magento2'@'localhost';
Mã:
mysql> FLUSH PRIVILEGES;
mysql> EXIT;
Cài đặt Composer
Composer là trình quản lý phụ thuộc cho PHP được sử dụng để cài đặt các phụ thuộc PHP cần thiết cho dự án PHP của bạn.Đầu tiên, hãy cài đặt công cụ dòng lệnh Curl sử dụng lệnh sau:
Mã:
apt-get install curl -y
Mã:
curl -sS https://getcomposer.org/installer -o composer-setup.php
php composer-setup.php --install-dir=/usr/local/bin --filename=composer
Mã:
All settings correct for using Composer
Downloading...
Composer (version 2.3.5) successfully installed to: /usr/local/bin/composer
Use it: php /usr/local/bin/composer
Mã:
composer --version
Mã:
Composer version 2.3.5 2022-04-13 16:43:00Tải xuống và cài đặt Magento trên Ubuntu 22.04
Trong phần này, chúng tôi sẽ tải xuống phiên bản Magento 2.4.3 bằng Composer. Để thực hiện, bạn sẽ cần tạo khóa truy cập sau khi đăng nhập vào trang web Magento. https://marketplace.magento.com/customer/accessKeys/. Sau khi tạo khóa truy cập, hãy chạy lệnh sau để tải Magento xuống máy chủ của bạn:
Mã:
cd /var/www/html
composer create-project --repository-url=https://repo.magento.com/ magento/project-community-edition=2.4.3 magento2
Mã:
Creating a "magento/project-community-edition=2.4.3" project at "./magento2"
Warning from repo.magento.com: You haven't provided your Magento authentication keys. For instructions, visit https://devdocs.magento.com/guides/v2.3/install-gde/prereq/connect-auth.html Authentication required (repo.magento.com): Username: a6b333ad41629bac913eaabb9b8e053c Password:
Do you want to store credentials for repo.magento.com in /root/.config/composer/auth.json ? [Yn] Y
Installing magento/project-community-edition (2.4.3) - Downloading magento/project-community-edition (2.4.3) - Installing magento/project-community-edition (2.4.3): Extracting archive
Created project in /var/www/html/magento2
Loading composer repositories with package information
Info from https://repo.packagist.org: #StandWithUkraine
Mã:
chown -R www-data:www-data /var/www/html/magento2/
cd /var/www/html/magento2
find var generated vendor pub/static pub/media app/etc -type f -exec chmod g+w {} +
find var generated vendor pub/static pub/media app/etc -type d -exec chmod g+ws {} +
chown -R :www-data .
chmod u+x bin/magento
Mã:
bin/magento setup:install --base-url=http://magento.example.com --db-host=localhost --db-name=magento2 --db-user=magento2 --db-password=password --admin-firstname=Hitesh --admin-lastname=Jethva [emailprotected] --admin-user=admin --admin-password=Magento@Secure1Password --language=en_US --currency=USD --timezone=America/Chicago --use-rewrites=1
Mã:
Could not validate a connection to Elasticsearch. No alive nodes found in your cluster
Mã:
php bin/magento module:disable {Magento_Elasticsearch,Magento_InventoryElasticsearch,Magento_Elasticsearch6,Magento_Elasticsearch7}
Mã:
The following modules have been disabled:
- Magento_Elasticsearch
- Magento_Elasticsearch6
- Magento_InventoryElasticsearch
- Magento_Elasticsearch7
Cache cleared successfully.
Generated classes cleared successfully. Please run the 'setup:di:compile' command to generate classes.
Info: Some modules might require static view files to be cleared. To do this, run 'module:disable' with the --clear-static-content option to clear them.
Mã:
sudo -u www-data bin/magento module:disable Magento_TwoFactorAuth
Mã:
The following modules have been disabled:
- Magento_TwoFactorAuth
Cache cleared successfully.
Generated classes cleared successfully. Please run the 'setup:di:compile' command to generate classes.
Info: Some modules might require static view files to be cleared. To do this, run 'module:disable' with the --clear-static-content option to clear them.
Mã:
bin/magento setup:install --base-url=http://magento.example.com --db-host=localhost --db-name=magento2 --db-user=magento2 --db-password=password --admin-firstname=Hitesh --admin-lastname=Jethva [emailprotected] --admin-user=admin --admin-password=Magento@Secure1Password --language=en_US --currency=USD --timezone=America/Chicago --use-rewrites=1
Mã:
[Progress: 1359 / 1366]
Module 'Yotpo_Yotpo':
[Progress: 1360 / 1366]
Enabling caches:
Current status:
layout: 1
block_html: 1
full_page: 1
[Progress: 1361 / 1366]
Installing admin user...
[Progress: 1362 / 1366]
Caches clearing:
Cache cleared successfully
[Progress: 1363 / 1366]
Disabling Maintenance Mode:
[Progress: 1364 / 1366]
Post installation file permissions check...
For security, remove write permissions from these directories: '/var/www/html/magento2/app/etc'
[Progress: 1365 / 1366]
Write installation date...
[Progress: 1366 / 1366]
[SUCCESS]: Magento installation complete.
[SUCCESS]: Magento Admin URI: /admin_1u9o0y
Nothing to import.
Mã:
sudo -u www-data bin/magento cache:flush
sudo -u www-data bin/magento cron:installCấu hình Apache cho Magento
Tiếp theo, bạn sẽ cần tạo tệp cấu hình máy chủ ảo Apache để phục vụ Magento trên web.
Mã:
nano /etc/apache2/sites-available/magento2.conf
Mã:
ServerAdmin [emailprotected] DocumentRoot /var/www/html/magento2/ ServerName magento.example.com Options FollowSymlinks AllowOverride All Require all granted ErrorLog ${APACHE_LOG_DIR}/magento2_error.log CustomLog ${APACHE_LOG_DIR}/magento2_access.log combined
Mã:
a2ensite magento2.conf
a2enmod rewrite
Mã:
systemctl restart apache2
Mã:
systemctl status apache2
Mã:
? apache2.service - The Apache HTTP Server Loaded: loaded (/lib/systemd/system/apache2.service; enabled; vendor preset: enabled) Active: active (running) since Fri 2022-04-29 09:03:19 UTC; 2s ago Docs: https://httpd.apache.org/docs/2.4/ Process: 39790 ExecStart=/usr/sbin/apachectl start (code=exited, status=0/SUCCESS) Main PID: 39794 (apache2) Tasks: 6 (limit: 4630) Memory: 14.1M CPU: 132ms CGroup: /system.slice/apache2.service ??39794 /usr/sbin/apache2 -k start ??39795 /usr/sbin/apache2 -k start ??39796 /usr/sbin/apache2 -k start ??39797 /usr/sbin/apache2 -k start ??39798 /usr/sbin/apache2 -k start ??39799 /usr/sbin/apache2 -k start
Apr 29 09:03:19 ubuntu systemd[1]: Starting The Apache HTTP Server...
Truy cập Giao diện web Magento
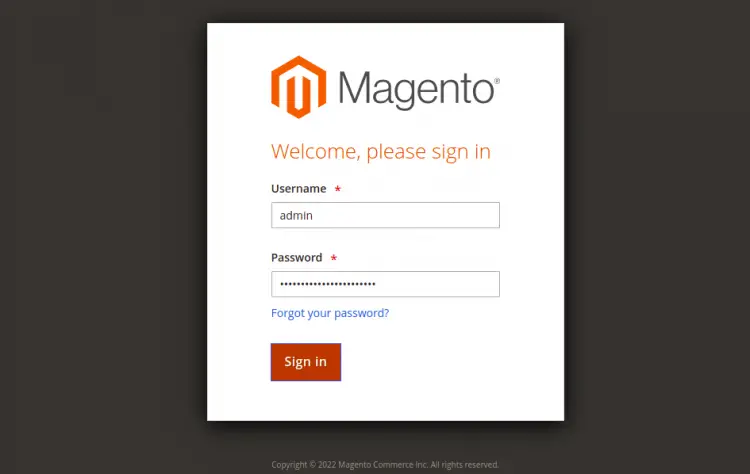
Bây giờ, hãy mở trình duyệt web của bạn và truy cập bảng điều khiển Magento bằng URL . Bạn sẽ được chuyển hướng đến trang đăng nhập Magento:
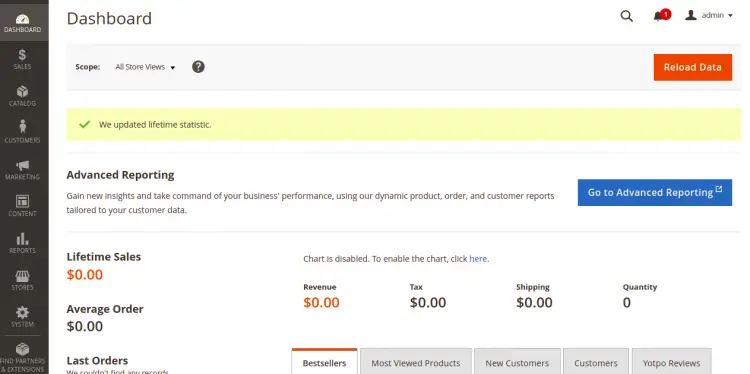
Cung cấp tên người dùng, mật khẩu quản trị viên và nhấp vào nút Đăng nhập. Bạn sẽ thấy bảng điều khiển Magento trên màn hình sau:
Bảo mật Magento bằng Let's Encrypt SSL
Luôn là một ý tưởng hay khi bảo mật trang web của bạn bằng Let's Encrypt SSL. Bạn sẽ cần cài đặt ứng dụng khách Certbot để cài đặt và quản lý SSL. Bạn có thể cài đặt bằng lệnh sau:
Mã:
apt-get install python3-certbot-apache -y
Mã:
certbot --apache -d magento.example.com
Mã:
Saving debug log to /var/log/letsencrypt/letsencrypt.log
Plugins selected: Authenticator standalone, Installer None
Enter email address (used for urgent renewal and security notices) (Enter 'c' to
cancel): [emailprotected]
- - - - - - - - - - - - - - - - - - - - - - - - - - - - - - - - - - - - - - - -
Please read the Terms of Service at
https://letsencrypt.org/documents/LE-SA-v1.2-November-15-2017.pdf. You must
agree in order to register with the ACME server at
https://acme-v02.api.letsencrypt.org/directory
- - - - - - - - - - - - - - - - - - - - - - - - - - - - - - - - - - - - - - - -
(A)gree/(C)ancel: A
- - - - - - - - - - - - - - - - - - - - - - - - - - - - - - - - - - - - - - - -
Would you be willing to share your email address with the Electronic Frontier
Foundation, a founding partner of the Let's Encrypt project and the non-profit
organization that develops Certbot? We'd like to send you email about our work
encrypting the web, EFF news, campaigns, and ways to support digital freedom.
- - - - - - - - - - - - - - - - - - - - - - - - - - - - - - - - - - - - - - - -
(Y)es/(N)o: Y
Plugins selected: Authenticator apache, Installer apache
Obtaining a new certificate
Performing the following challenges:
http-01 challenge for magento.example.com
Enabled Apache rewrite module
Waiting for verification...
Cleaning up challenges
Created an SSL vhost at /etc/apache2/sites-available/magento-le-ssl.conf
Enabled Apache socache_shmcb module
Enabled Apache ssl module
Deploying Certificate to VirtualHost /etc/apache2/sites-available/magento-le-ssl.conf
Enabling available site: /etc/apache2/sites-available/magento-le-ssl.conf
Mã:
Please choose whether or not to redirect HTTP traffic to HTTPS, removing HTTP access.
- - - - - - - - - - - - - - - - - - - - - - - - - - - - - - - - - - - - - - - -
1: No redirect - Make no further changes to the webserver configuration.
2: Redirect - Make all requests redirect to secure HTTPS access. Choose this for
new sites, or if you're confident your site works on HTTPS. You can undo this
change by editing your web server's configuration.
- - - - - - - - - - - - - - - - - - - - - - - - - - - - - - - - - - - - - - - -
Select the appropriate number [1-2] then [enter] (press 'c' to cancel): 2
Mã:
Enabled Apache rewrite module
Redirecting vhost in /etc/apache2/sites-enabled/magento.conf to ssl vhost in /etc/apache2/sites-available/magento-le-ssl.conf
- - - - - - - - - - - - - - - - - - - - - - - - - - - - - - - - - - - - - - - -
Congratulations! You have successfully enabled https://magento.example.com
You should test your configuration at:
https://www.ssllabs.com/ssltest/analyze.html?d=magento.example.com
- - - - - - - - - - - - - - - - - - - - - - - - - - - - - - - - - - - - - - - -
IMPORTANT NOTES: - Congratulations! Your certificate and chain have been saved at: /etc/letsencrypt/live/magento.example.com/fullchain.pem Your key file has been saved at: /etc/letsencrypt/live/magento.example.com/privkey.pem Your cert will expire on 2023-01-23. To obtain a new or tweaked version of this certificate in the future, simply run certbot again with the "certonly" option. To non-interactively renew *all* of your certificates, run "certbot renew" - If you like Certbot, please consider supporting our work by: Donating to ISRG / Let's Encrypt: https://letsencrypt.org/donate Donating to EFF: https://eff.org/donate-le